Step-by-Step: Registering a Client
The Client Registration Flow (/clients/register) onboards a new borrower through structured steps, capturing identity verification, contact information, KYC files, initial security, and the mandatory Registration Fee Payment that activates the account.
1. Client Identifier Resolution
In BiiTrust, client identification is structured across two primary references:
- National ID / Hex (
org_clients.hex): The borrower’s official citizen identity number (digits only, e.g.13253018,39136093). This matchesauth_accounts.identityand acts as the unique cryptographic anchor for credit scoring and M-Pesa C2B Paybill matching. - Client Display Number (
org_clients.number): The institutional formatted identifier with branch code (e.g.,HQ-002751,NBO-001042).
All system searches, APIs, and staff lookup tools accept either format interchangeably.
2. The Steps of Registration
Step 1: Field Office & Officer Assignment
- Select Office: Defaults to your assigned operational branch. If onboarding across branches, search for the target branch by name, code, or county.
- Assign Loan Officer: Defaults to your user profile. Branch Managers can assign the new borrower to any active loan officer in that branch.
- Click Continue.
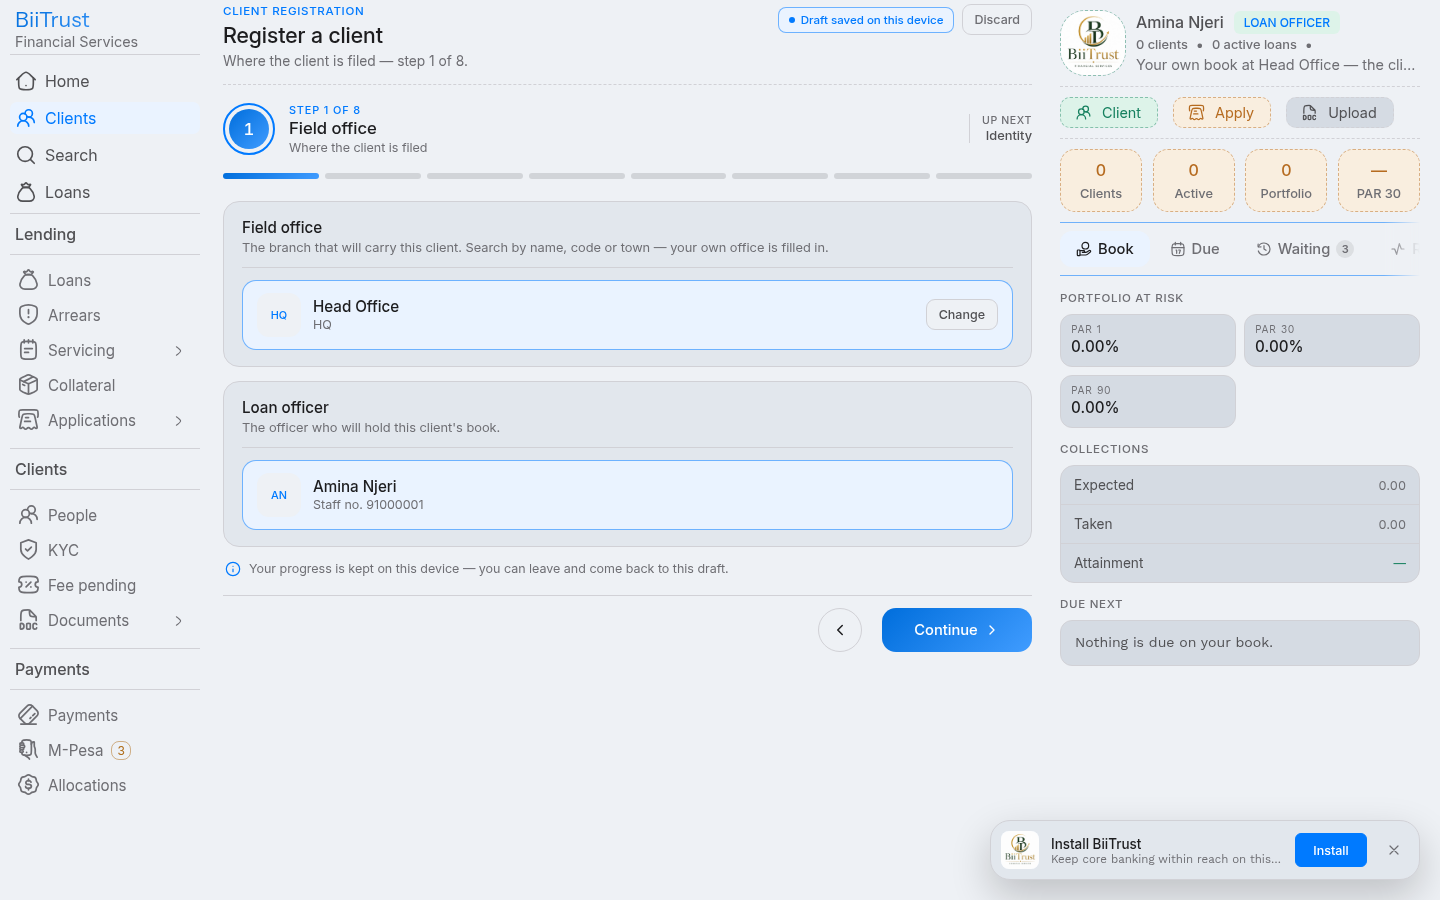 Figure 2.1: Step 1 Field Office selection and Loan Officer assignment.
Step 2: Legal Identity
- Full Legal Name: Enter the customer’s official three names exactly as printed on their government ID.
- Date of Birth & Gender: Enter date of birth. The platform calculates age and enforces regulatory age limits (minimum 18 years).
- ID Type & Number: Select
National ID,Passport,Alien Card, orMilitary ID. Enter the unique National ID number (digits only). - Primary Mobile Phone: Enter the borrower’s registered M-Pesa phone number (e.g.
0712 345 678or254712345678). - Initial KYC Tier:
Basic: Up to KES 50,000 borrowing ceiling.Standard: Up to KES 500,000 borrowing ceiling.Enhanced: Unlimited borrowing (subject to institutional limits).
- Click Continue.
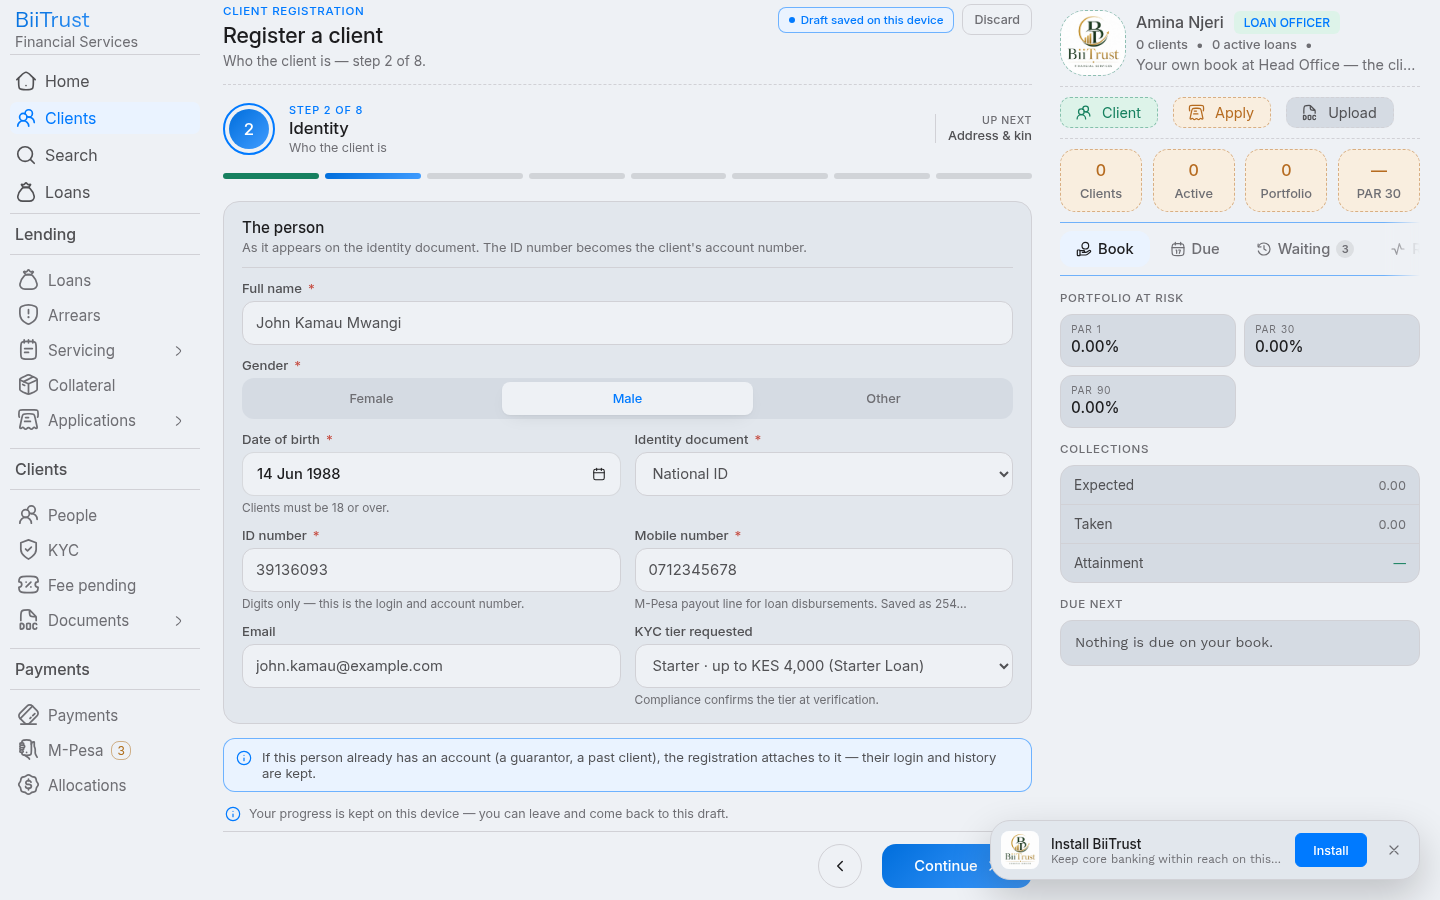 Figure 2.2: Step 2 Legal Identity input, National ID validation, and KYC Tier selector.
Step 3: Physical Address & Next-of-Kin
- Physical Residence: County, sub-county, town/ward, village/estate, and nearest physical landmark.
- Next-of-Kin Contacts:
- Click Add Kin Contact.
- Enter full legal name, relationship (
Spouse,Parent,Sibling,Child,Guardian), and active phone number. - At least one verified next-of-kin is mandatory for credit origination.
- Click Continue.
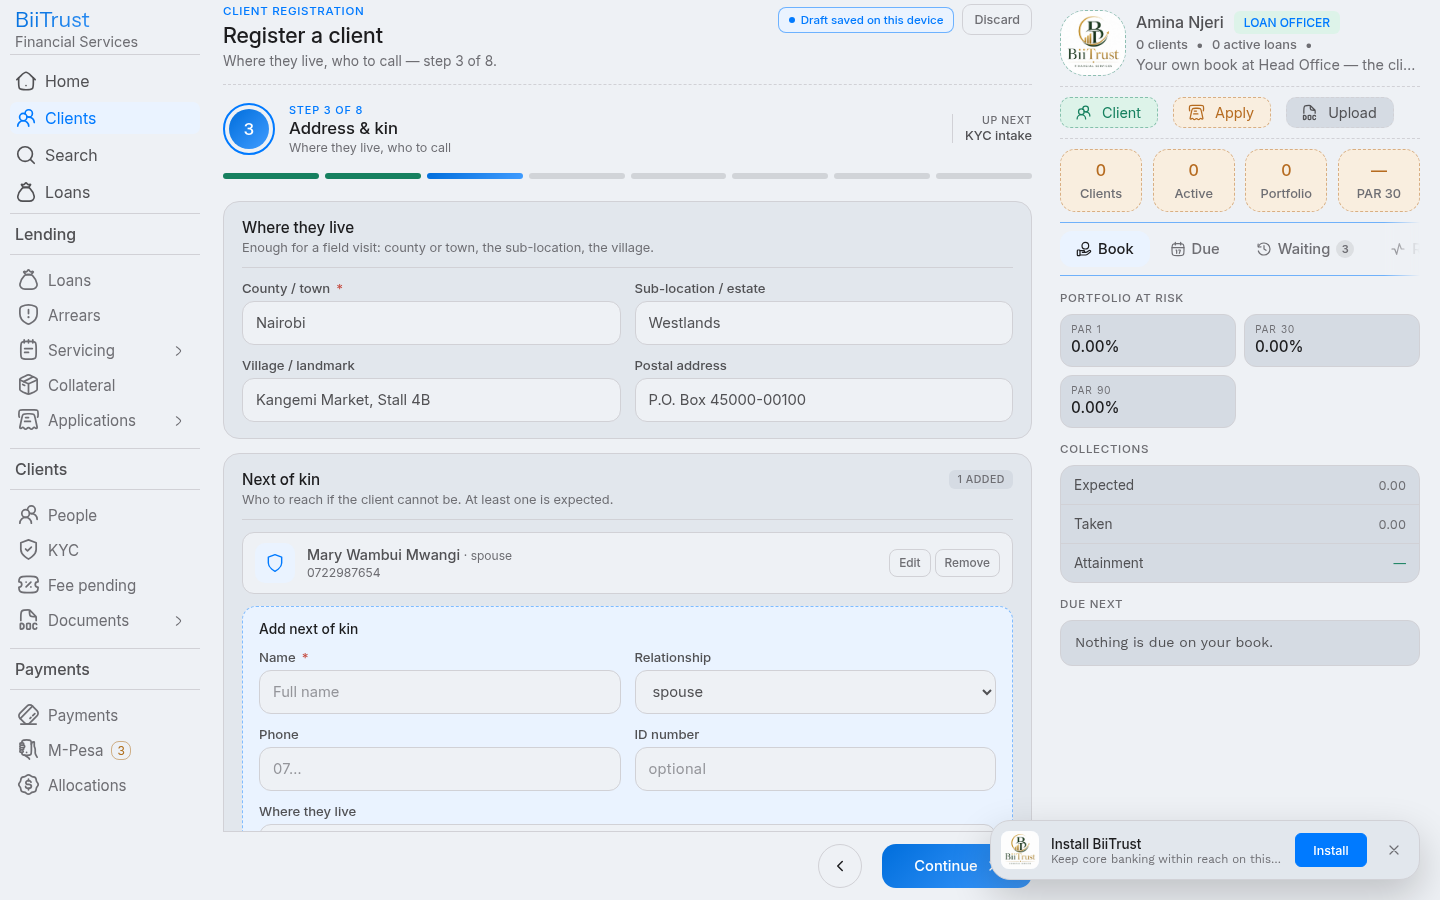 Figure 2.3: Step 3 Residence address and Next-of-Kin contact records.
Step 4: Digital KYC Evidence Capture
- Customer Portrait Photo: Tap Take Photo to capture a clear headshot or upload a JPEG/PNG portrait against a plain background.
- National ID Scans:
- Upload front side of the physical National ID card.
- Upload back side of the National ID card.
- Touchscreen Signature: Have the customer sign directly on the touchscreen pad or upload a signed physical mandate.
- Click Continue.
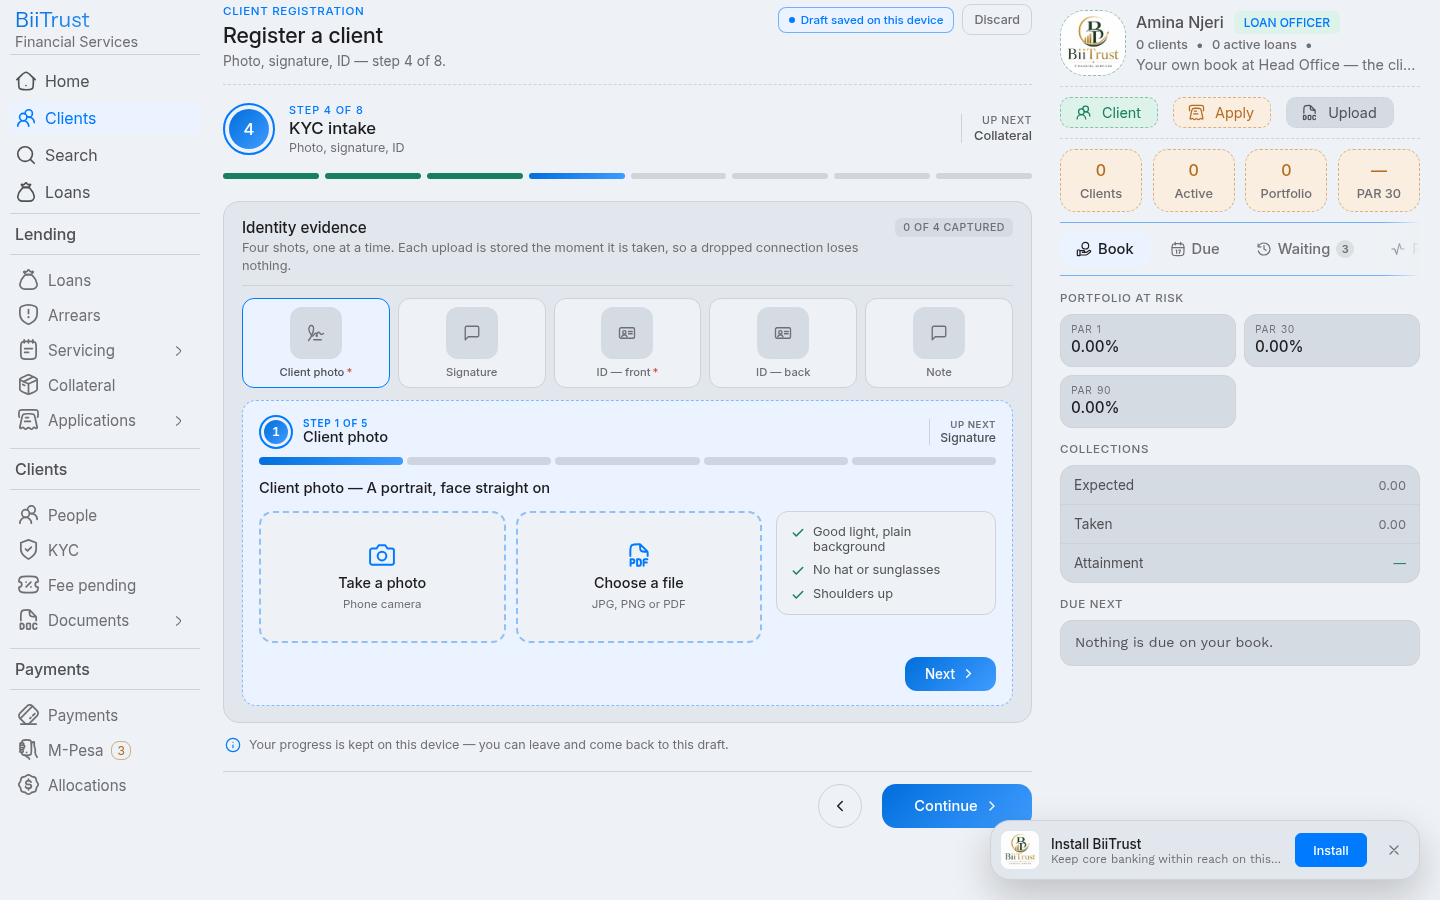 Figure 2.4: Step 4 Customer photo capture, ID scans, and digital signature.
Step 5: Collateral Assets (Optional at Onboarding)
- If onboarding an asset-financing or secured borrower:
- Click Add Pledged Asset.
- Select asset kind (
Motorcycle,Vehicle,Household Goods,Business Stock,Land Title Deed). - Enter market valuation and forced-sale valuation.
- If onboarding an unsecured micro-credit customer, click Continue to skip.
Step 6: Supporting Financial Documents
- Upload 6-month M-Pesa statement PDFs, bank statements, municipal business permits, or salary payslips.
- Files upload immediately to secure storage.
- Click Continue.
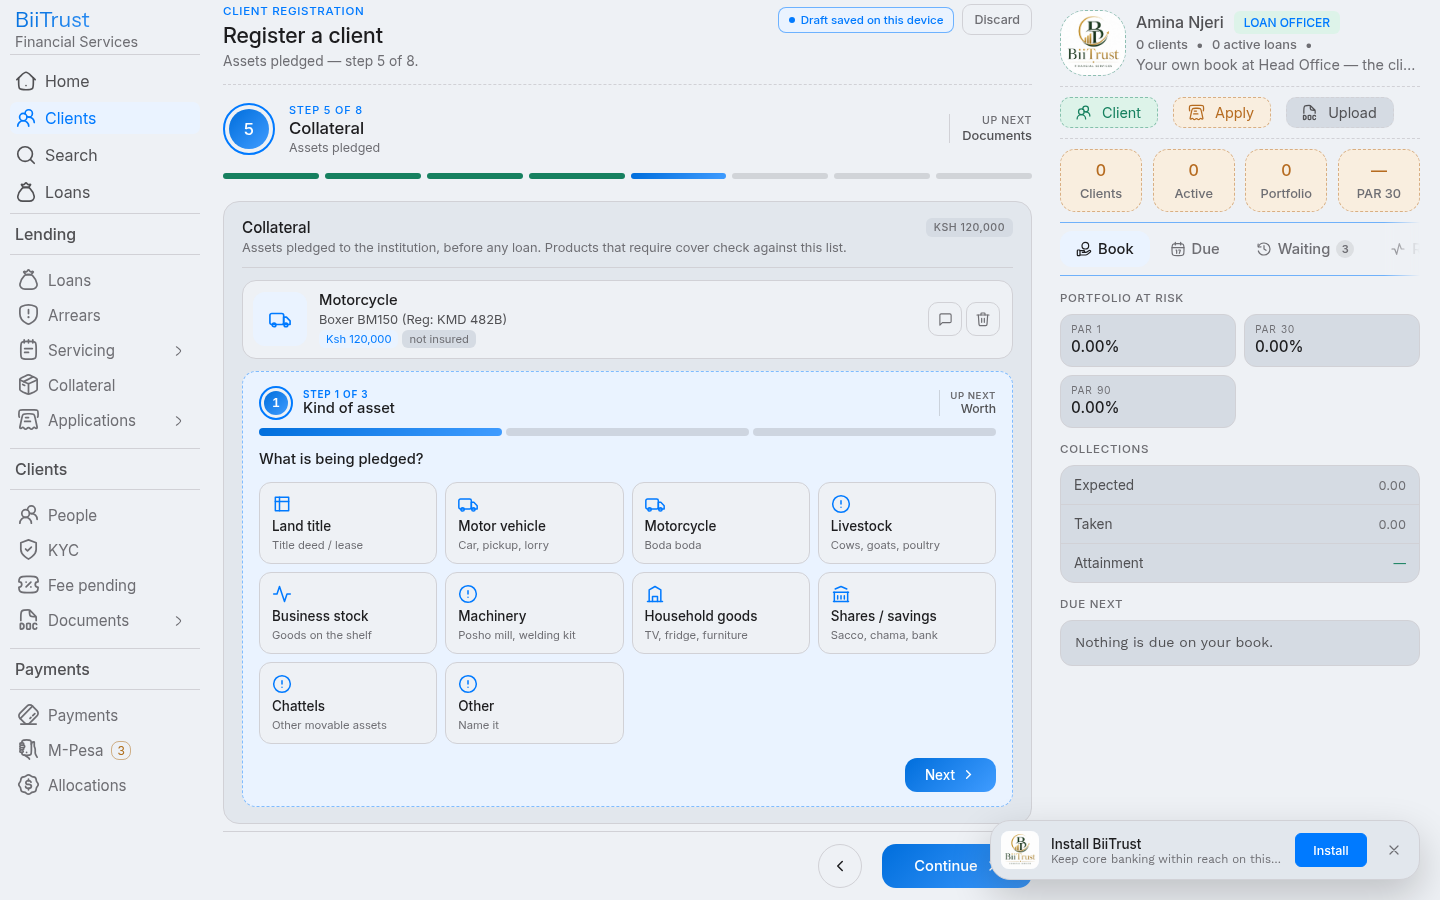 Figure 2.5: Steps 5 and 6 Pledged asset valuations and supporting cashflow documents.
Step 7: Review & Account Creation
- Dossier Audit: Inspect all entered details on the consolidated read-back summary.
- Duplicate Check: The system validates that the National ID number does not already exist in the database.
- Register: Click Register Client.
- The client account is created with
status: 'prospect'. - The KYC bundle is queued to the Compliance verification feed (
/kyc/feed).
- The client account is created with
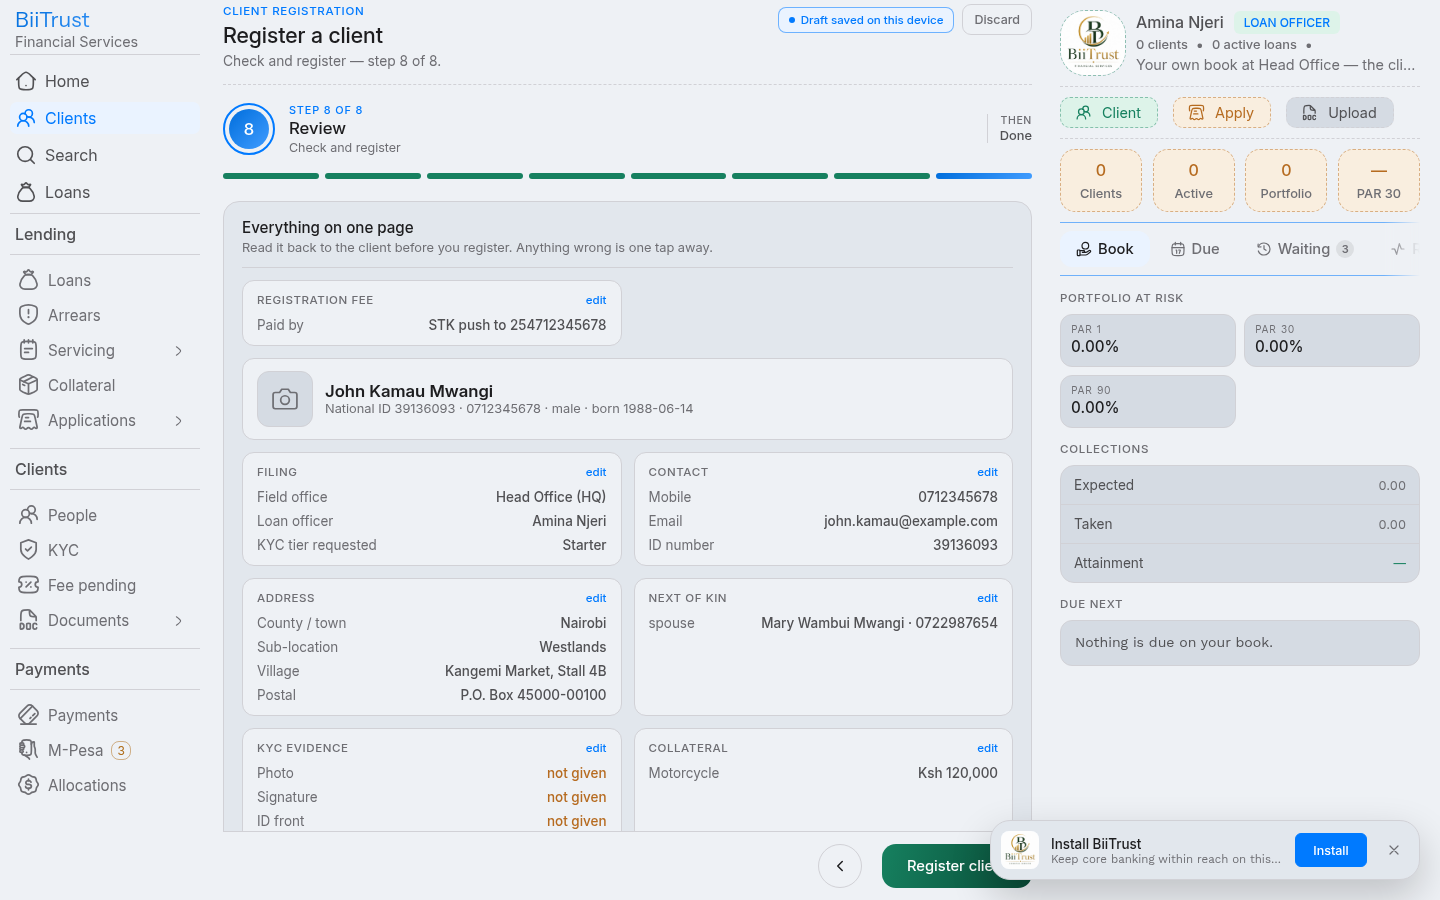 Figure 2.6: Step 7 Consolidated summary card and creation of client prospect account.
3. Mandatory Registration Fee Payment (Account Activation)
A newly registered client remains in prospect status and cannot borrow until the institutional onboarding registration fee (e.g., KES 300) is settled.
┌────────────────────────────────────────────────────────────────────────┐
│ Prospect Client (Fee Unpaid)                                          │
│   ├── Blocked from Loan Origination                                    │
│   ▼                                                                    │
│ [ Settle Registration Fee ] ──► M-Pesa STK / Paybill / Cash            │
│   ▼                                                                    │
│ Active Client (status = 'active')                                      │
│   ├── Fee Cleared · GL Posted (Dr 1103 / Cr 4200)                      │
│   └── Eligible to Apply (subject to KYC verification)                  │
└────────────────────────────────────────────────────────────────────────┘
Payment Settlement Channels:
- Instant M-Pesa STK Push Prompt:
- On the client profile or registration summary, click Pay Registration Fee.
- Confirm the client’s phone number and click Send M-Pesa Prompt.
- An STK prompt appears on the borrower’s phone requesting their M-Pesa PIN.
- Upon PIN entry, Safaricom sends an instant callback, clearing the fee.
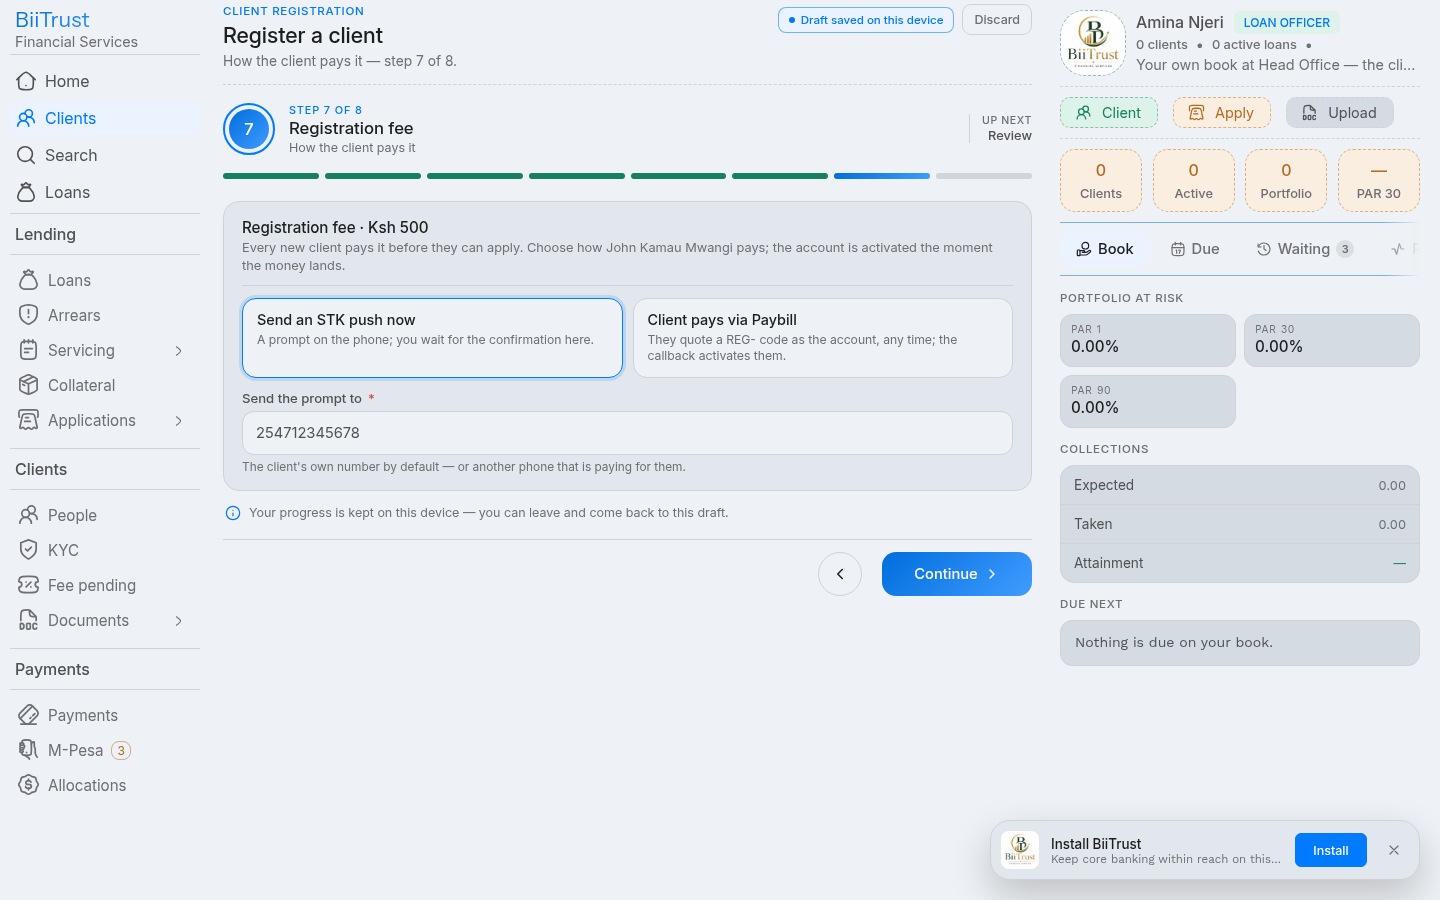 Figure 2.7: Initiating instant M-Pesa STK push prompt for KES 300 registration fee.
- Offline Lipa na M-Pesa Paybill
4050329:- Customer opens M-Pesa → Lipa na M-Pesa → Paybill.
- Business Number:
4050329. - Account Number:
3907#REG-<NATIONAL_ID>(e.g.,3907#REG-13253018). - The system automatically strips the prefix
3907#, matchesREG-13253018, credits the fee, and marks the clientactive.
- Cash / Receipt Verification:
- If the customer pays cash over the counter or enters a Paybill receipt:
- Teller enters the Safaricom receipt code under Verify Registration Fee.
- Calls
POST /payments/registration-fee/verify.
General Ledger Impact:
Every settled registration fee creates an automatic, balanced double-entry accounting journal:
- Debit:
1103(M-Pesa Collections Float / Cash Asset) - Credit:
4200(Registration & Administrative Fee Income)
Post-Activation State:
org_clients.statusflips from'prospect'→'active'.- Registration chip on the borrower profile and search cards displays
<span class="chip ok">active</span>.
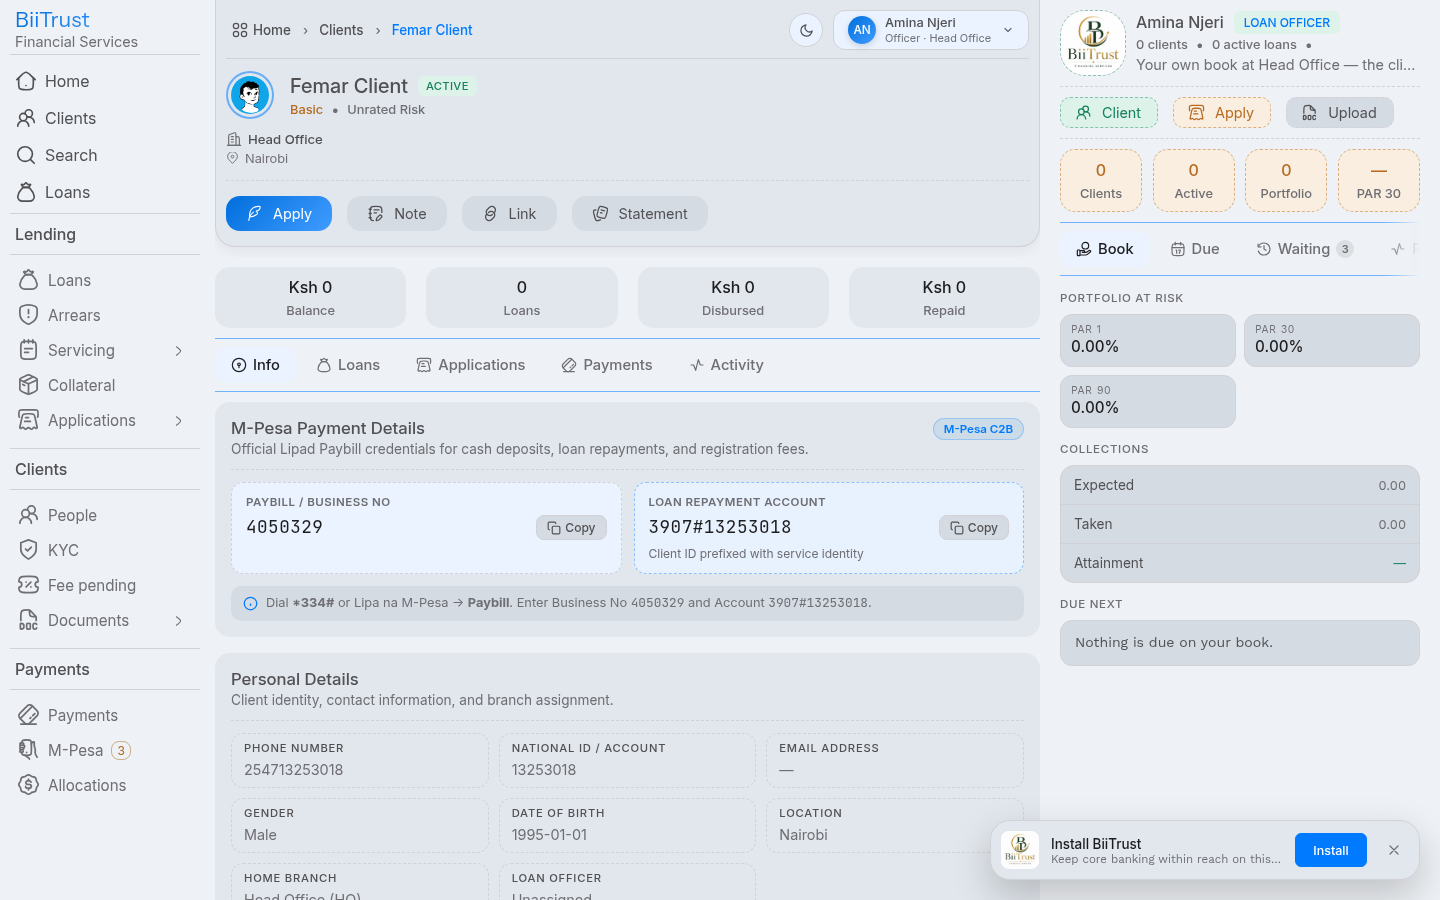 Figure 2.8: Activated borrower profile showing active registration status and fee clearance receipt.