Step-by-Step: Originating a Loan Application
The Loan Origination Flow (/applications/new) allows loan officers and managers to create a new credit request in six guided steps, protected by strict pre-flight compliance gates.
1. Hard Pre-Flight Eligibility Gates (Step 0)
Before an application can advance past the borrower intake step, the platform enforces two non-negotiable statutory gates:
┌────────────────────────────────────────────────────────────────────────┐
│ Pre-Flight Gate 1: Registration Fee Cleared                            │
│   ├── Client status must be 'active'                                   │
│   └── If 'prospect' or 'pending', blocked with link to settle fee      │
├────────────────────────────────────────────────────────────────────────┤
│ Pre-Flight Gate 2: Compliance KYC Verified                             │
│   ├── Verification status must be 'verified'                           │
│   ├── Expiration horizon must be in the future (expires > today)       │
│   └── If unverified/expired, blocked with link to compliance feed     │
└────────────────────────────────────────────────────────────────────────┘
If either gate is not satisfied, the application wizard hard-blocks with a contextual warning banner:
- “Client registration fee is unpaid. Registration fee must be cleared before applying for credit.”
- “Client KYC is not verified. Compliance verification is required before loan origination.”
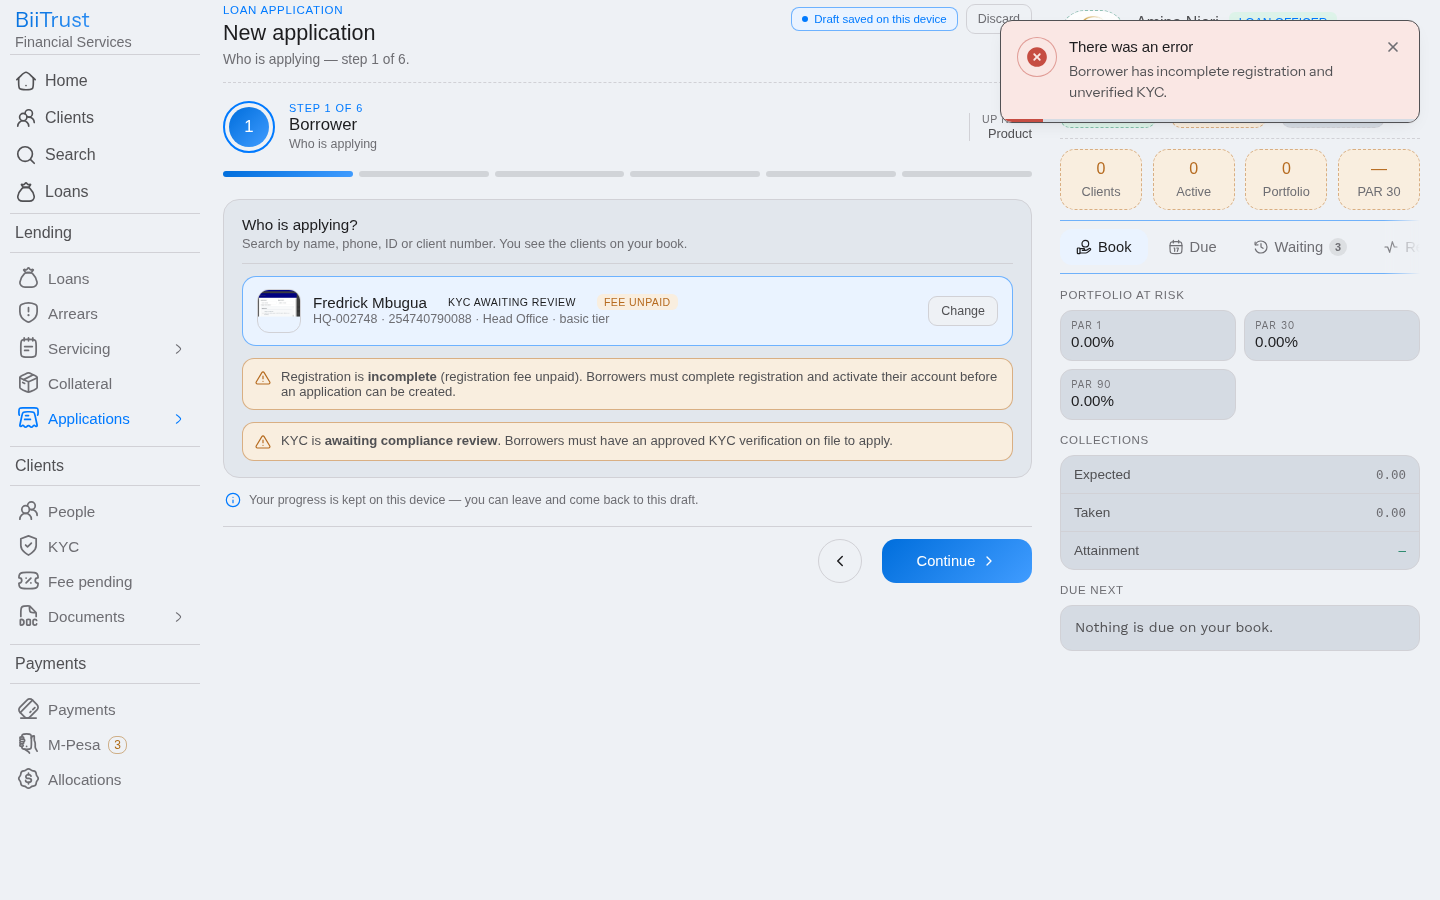 Figure 4.1: Pre-flight eligibility gate warning banner blocking progress when fee is unpaid or KYC unverified.
2. The Six Steps of Origination
Step 1: Select Borrower & Eligibility Inspection
- Borrower Lookup: Search by National ID digits (
hex, e.g.13253018,39136093), formatted client number (number, e.g.HQ-002751), phone, or name. - Borrower Search Card Anatomy:
- Registration Chip: Displays
<span class="chip ok">active</span>(green) or<span class="chip warn">fee unpaid</span>(amber). - KYC Chip: Displays
<span class="chip ok">verified: basic</span>(green) or<span class="chip warn">unverified</span>/expired(amber). - Eligibility Status: Displays
<span class="pill ok">Eligible</span>or<span class="pill warn">Ineligible</span>.
- Registration Chip: Displays
- Pre-Flight Evaluation: The system calls
GET /kyc/:client/eligibilityto verify the borrower’s tier borrowing limit and collateral standing against institutional policies. - Select the verified, active client and click Continue.
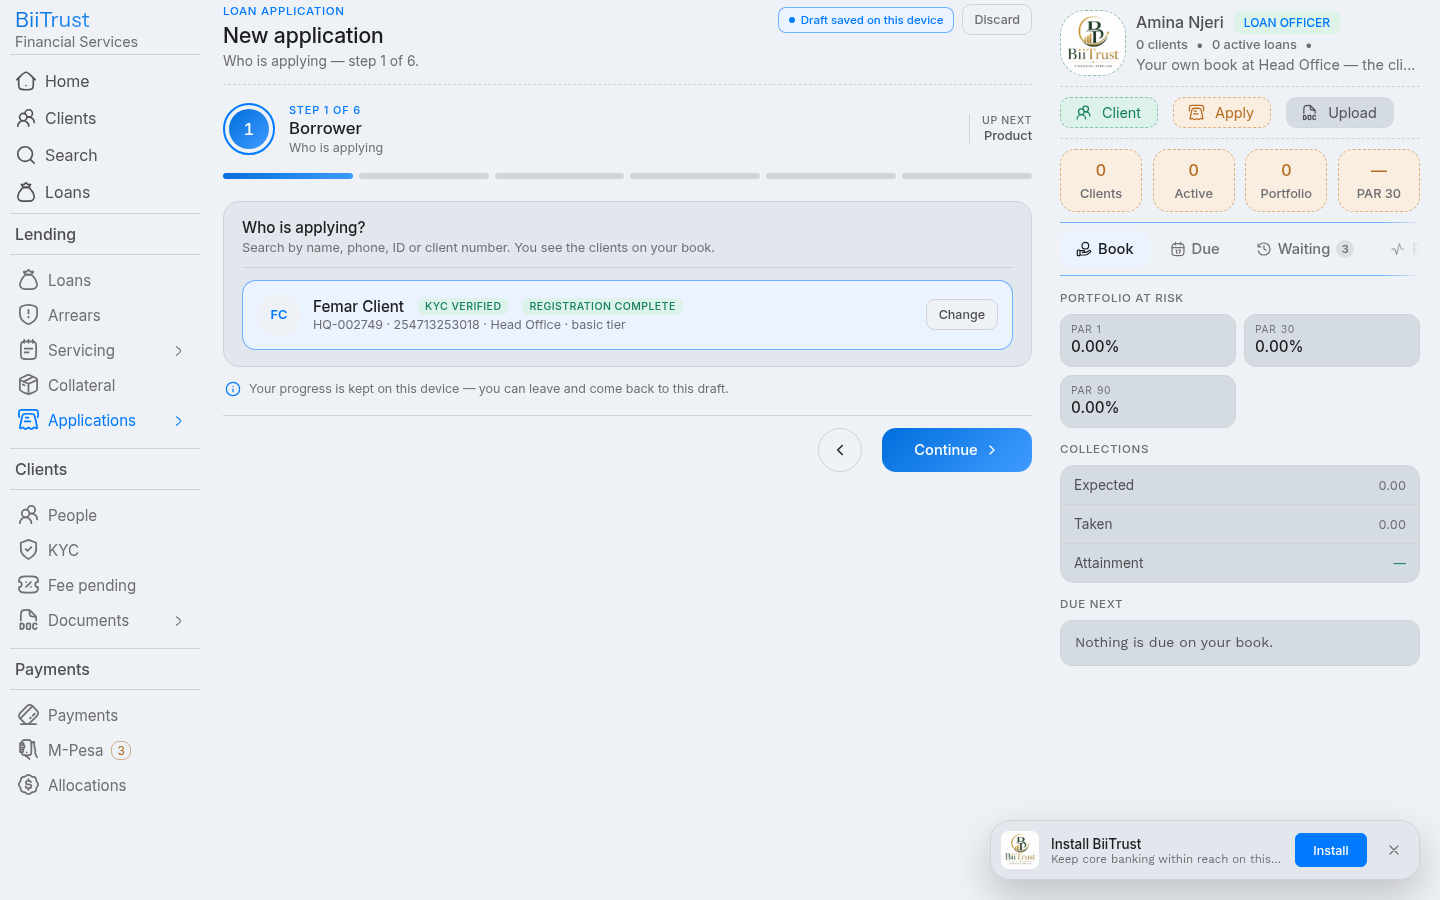 Figure 4.2: Step 1 Borrower intake search card displaying verified chips, active registration status, and eligible badge.
Step 2: Select Loan Product
- The screen displays all active credit products configured for your branch (e.g., Biashara Growth, Boda Advance, Kilimo Farm Credit, Emergency Facility).
- Each product card displays:
- Interest calculation method:
FlatorDeclining Balance. - Interest rate and repayment frequency (
Weekly,Bi-weekly,Monthly). - Minimum and maximum loan amount bounds.
- Processing fee structure (flat fee plus percentage of principal).
- Interest calculation method:
- Click on the product card to select it, then click Continue.
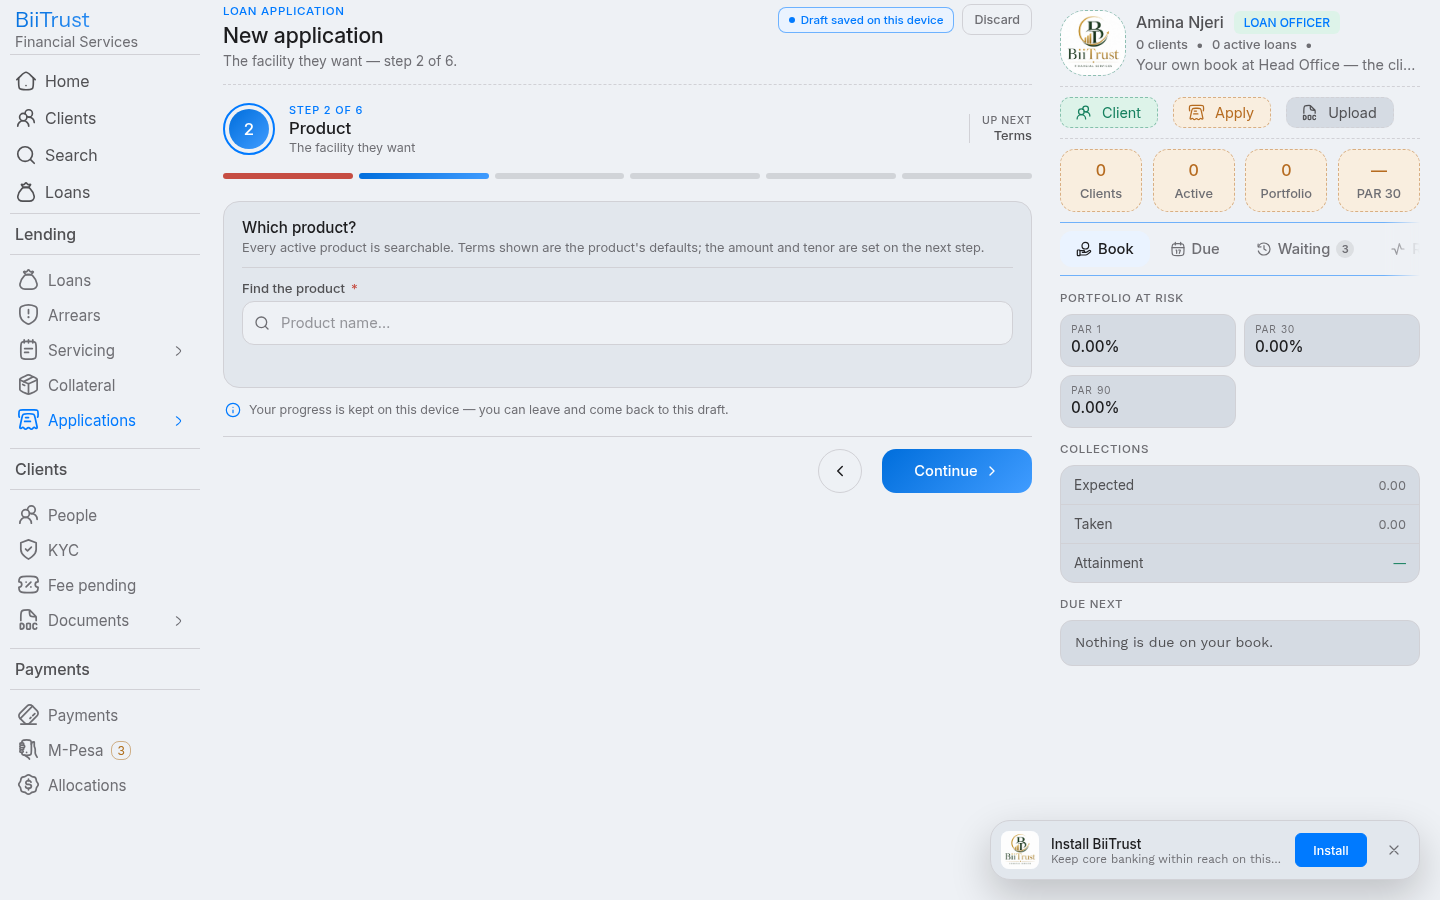 Figure 4.3: Step 2 Loan product selection matrix showing bounds, interest methods, and processing fees.
Step 3: Define Loan Terms & Instant Financial Preview
- Principal Amount: Enter the requested loan amount in the hero number field. The engine enforces the product minimum/maximum and the client’s KYC tier ceiling.
- Tenor / Duration: Enter the number of repayment installments (e.g.,
6monthly installments). - Loan Purpose: Select the economic use of funds (e.g.,
Business Stock & Inventory,Agricultural Inputs,Transport Equipment,School Fees). - Instant Financial Schedule Preview:
As you type the amount and tenor, the preview card calculates:
- Estimated Installment: Equal installment amount due per period (e.g., KES 5,833 / month).
- Total Interest: Total cost of credit over the full borrowing period.
- Processing Fees: Upfront administrative fees deducted at disbursement.
- Total Debt: Total aggregate obligation to be repaid.
- Click Continue.
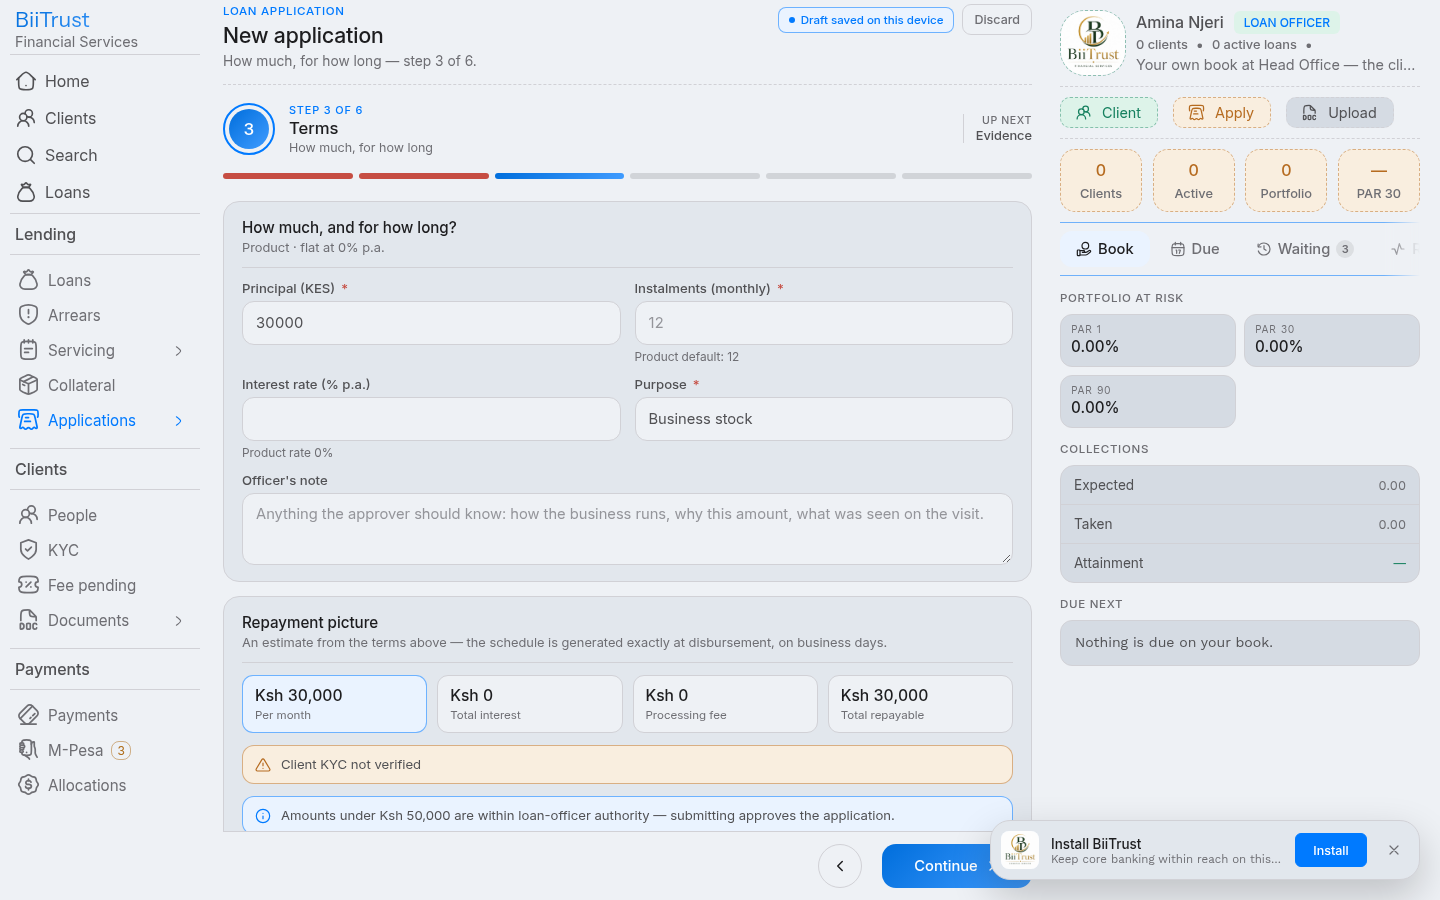 Figure 4.4: Step 3 Loan terms configuration with instant live preview of installments and debt breakdown.
Step 4: Attach Repayment Capacity Evidence
Every credit facility requires documented proof of debt-service capacity:
- Click Attach Evidence.
- Select the document type:
M-Pesa 6-Month Statement PDF,Bank Statement,Salary Payslip,Business Trading License, orSupplier Invoices. - Upload the file.
- Enter a brief note describing cashflow turnover (e.g., “M-Pesa statement shows steady monthly business turnover averaging KES 95,000”).
- Click Continue.
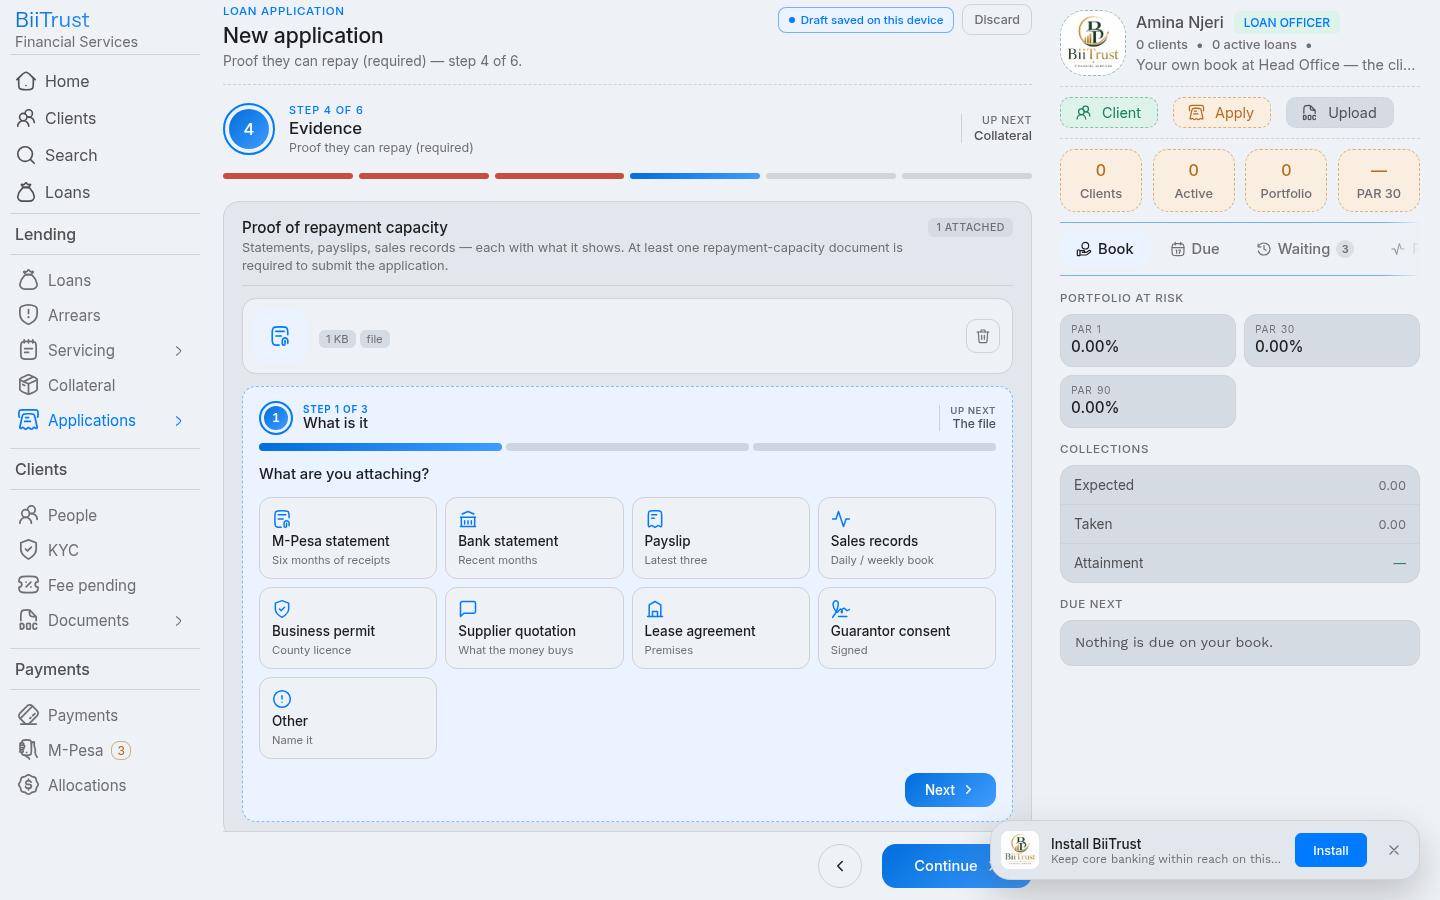 Figure 4.5: Step 4 Uploading 6-month M-Pesa cashflow statement and turnover documentation.
Step 5: Pledge Collateral Security
- Select existing assets from the borrower’s asset register or click Add New Collateral.
- Record asset details: make, serial/registration number, location, and forced-sale valuation.
- LTV Ratio Check: The system validates that total pledged collateral satisfies the product’s
max_ltv_ratiorule (e.g., 120% coverage of principal). - Click Continue.
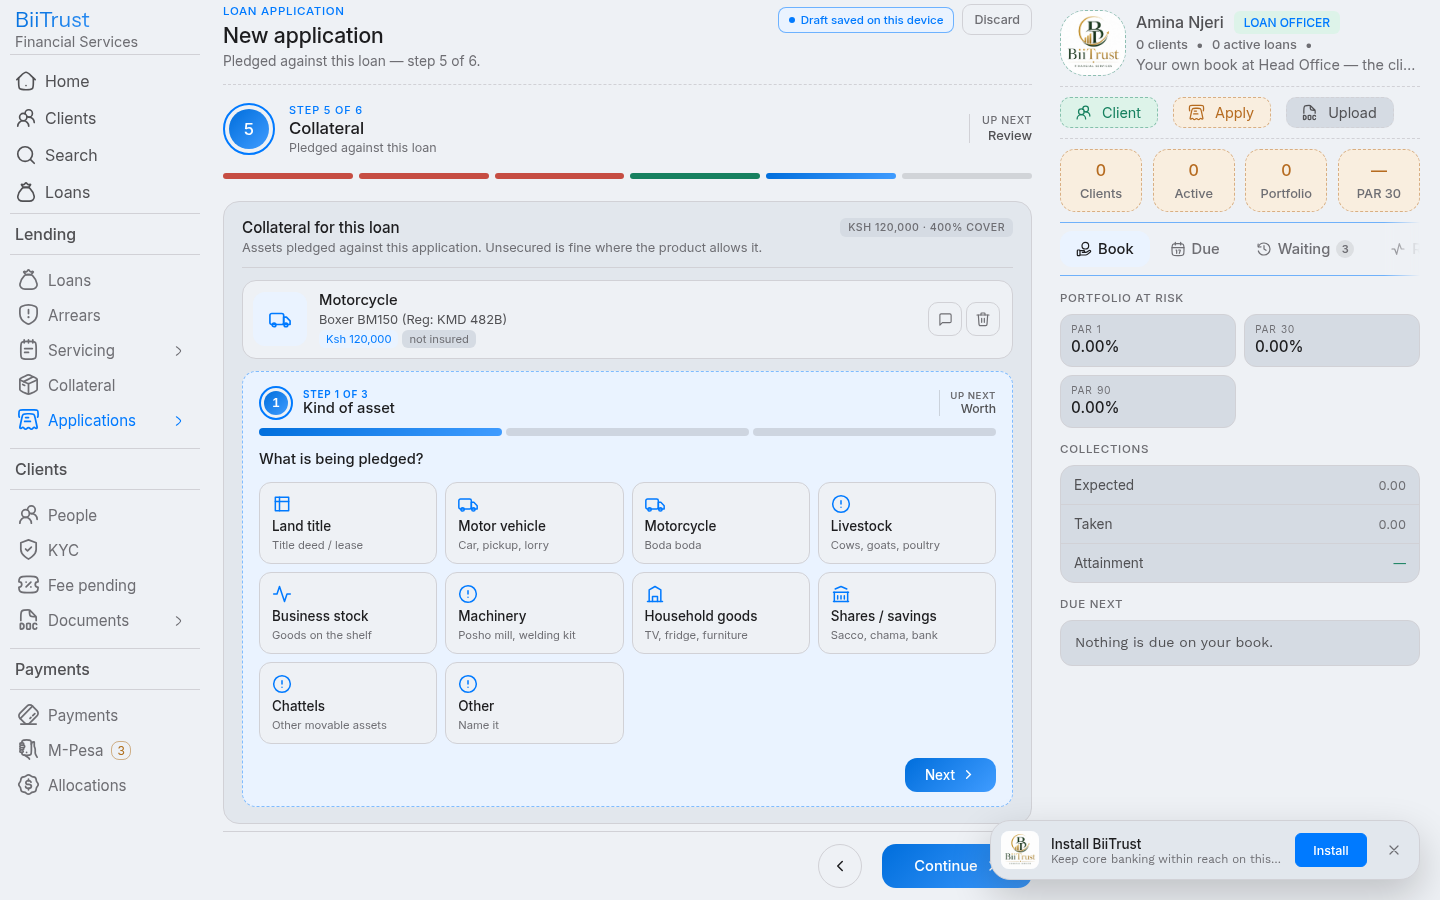 Figure 4.6: Step 5 Collateral security pledge with forced-sale valuation and LTV coverage ratio verification.
Step 6: Review, Credit Policy Checks & Submission
- Policy Check Strip: The automated engine evaluates institutional rules:
- Blacklist Screening: Asserts 0 hits in
kyc_blacklist. - Tier Ceiling: Asserts principal $\le$ KYC tier ceiling.
- Maximum Open Exposure: Validates aggregate portfolio exposure limit.
- Active Delinquency: Asserts client carries 0 overdue days on existing facilities.
- Blacklist Screening: Asserts 0 hits in
- Submission Mode:
- Submit to Manager: Attaches your Level 1 Loan Officer signature and moves the application to
reviewstatus on the Branch Manager’s desk. - Save as Draft: Keeps the dossier in draft on your desk if awaiting additional supporting documents.
- Submit to Manager: Attaches your Level 1 Loan Officer signature and moves the application to
- Click Create & Submit.
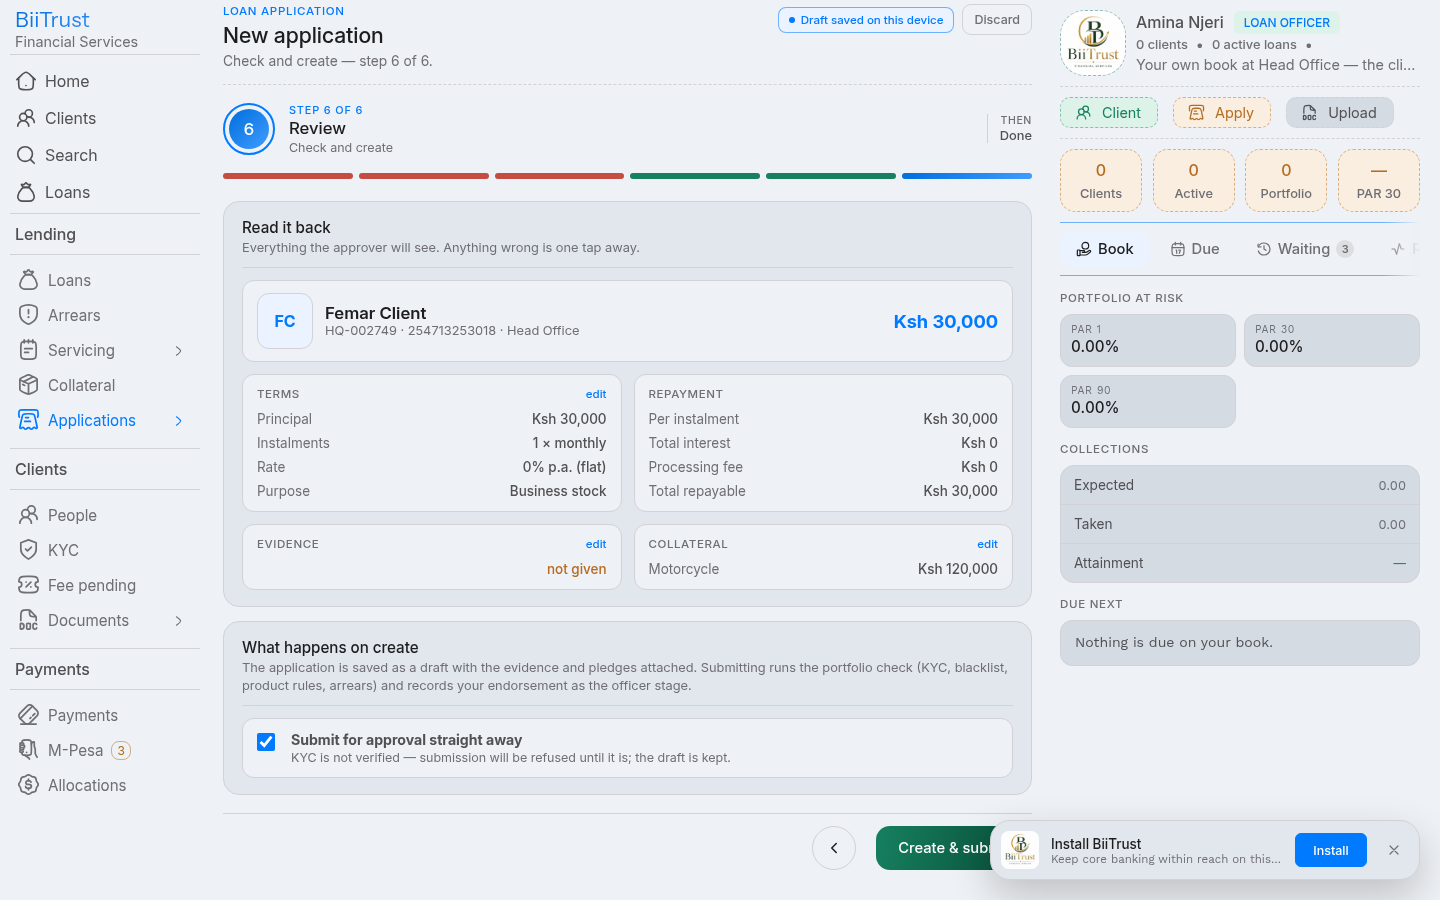 Figure 4.7: Step 6 Consolidated policy checks (all green) and final submission to branch manager queue.